If you’ve ever rummaged through a shared wardrobe at home, fumbled to keep kid-proof items out of reach, or needed to secure stored valuables in a small office, a cabinet lock for your wardrobe is one of the most practical, low-effort upgrades you can make. As a cabinet lock supplier who’s worked with hundreds of homeowners, apartment dwellers, and small business owners over the past seven years, I’ve seen firsthand how a few small missteps during installation can turn a quick job into a frustrating, time-wasting chore. Today, I’m walking you through a step-by-step, budget-friendly installation process that uses tools most people already own, and tips to make sure your new lock fits perfectly, stays secure, and looks seamless on any wardrobe. Cabinet Lock
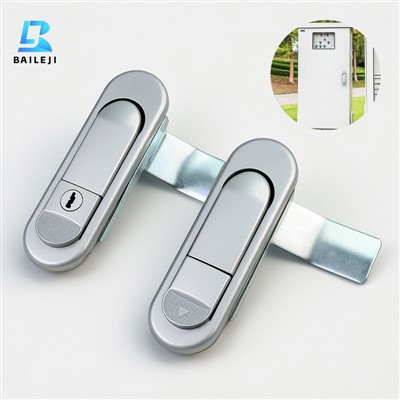
First, let’s talk about choosing the right lock for your wardrobe—because not all cabinet locks are created equal, and picking the wrong one will make installation way harder than it needs to be. I’ve seen customers show up to our shop with a random lock from a big-box store, only to realize it’s too long for their thin particleboard wardrobe door or too short to span two standard doors. Before you buy anything, take two quick measurements: first, the gap between the two wardrobe doors (if it’s a double-door unit) when they’re closed. Most standard double-door wardrobes have a gap between 1/8 inch and 1/4 inch, so you’ll need a latch-style interlock that fits that gap—avoid over-the-door locks if you have slim doors, as they can stick out awkwardly and get caught on clothing. For single-door wardrobes or those with a solid front, a cam lock is usually the best pick, as it installs flush against the door and frame for a clean look. Also, consider your use case: if you’re locking away cleaning supplies or tools that curious kids might get into, go for a keyed lock with a child-resistant cylinder; if it’s just for securing seasonal coats or office supplies, a combination lock will be easier to use long-term, no keys to lose. Pro tip from our team: always check your wardrobe door material first. If you have solid wood or metal, you’ll want a drill bit rated for that material, not the generic one that comes with most cheap lock kits—we usually recommend including a step bit in your kit for smooth, clean cuts, which saves you from splitting wood or stripping metal.
Once you’ve got your lock and tools ready, lay everything out on a flat surface. You only need six basic items for this job, most of which are probably already in your toolbox: a pencil, a tape measure, a spirit level (or a long straight edge if you don’t have one), a drill with drill bits matched to your door material, a screwdriver (usually Phillips-head, but check your lock’s hardware), and a set of small masking tape strips. If you don’t have a drill, don’t worry—many modern cabinet locks come with heavy-duty adhesive that works on smooth surfaces, but for a permanent, secure fit, drilling is always the better option. I always keep adhesive-only locks as a backup for renters who can’t drill into walls or doors, and I’ll include notes on installing those later in the post.
Now, the actual installation starts with marking your placement—this is the most important step, and rushing it is how you end up with a lopsided lock that won’t line up with the strike plate (the part that catches the lock on the opposite door or frame). The general rule for wardrobe locks is to place them at eye level, around 48 inches from the floor. That’s high enough that small kids can’t reach them easily, low enough that adults don’t have to stretch or bend to open them. For double-door wardrobes, you’ll need to mark two sets of holes: one on the edge of the right door (or left, depending on how you want it to open) for the lock cylinder, and a matching hole on the edge of the left door for the strike plate. For single-door wardrobes, mark the cylinder hole on the front of the door, and the strike plate hole on the door frame. To get a perfect, straight mark, line up your spirit level along the edge of the door and draw a light pencil line at 48 inches, then use your lock’s template (most good lock kits include a paper template for this exact purpose) to trace the size of the cylinder and strike plate onto that line. If you don’t have a template, measure the length of your lock cylinder (the part that goes through the door) and the width of the strike plate, then mark those dimensions evenly on your line. I always suggest placing small strips of masking tape over your marked holes before drilling. This stops the drill bit from slipping and skidding across the door surface, which is especially helpful if you’re working on smooth wood or laminate that’s prone to scratch marks.
Next, drilling the holes. This step feels intimidating for people who’ve never used a drill before, but it’s really simple if you go slow. First, set your drill to a low speed—high speed can splinter wood or warp metal. For the lock cylinder hole, drill straight through the door at the marked point, using a drill bit that matches the size of your lock’s cylinder. If you’re working with wood, apply light, steady pressure; if you’re drilling metal, go a little slower to avoid overheating the bit. Once the cylinder hole is done, test fit the cylinder to make sure it slides all the way through without wiggling or getting stuck. If it’s too tight, you can gently sand the edges of the hole with fine-grit sandpaper until it fits smoothly; if it’s too loose, add a tiny dot of wood glue or a small plastic shim to the inside of the hole before installing the cylinder. Now, drill the strike plate hole. The strike plate needs to be on the exact same alignment as the cylinder, so hold the strike plate up to the edge of the door frame (or the opposite door) and mark the screw holes, then drill small pilot holes—these tiny starter holes make it way easier to drive the screws in without splitting the wood. For metal frames, you’ll need a metal drill bit, and I always recommend drilling pilot holes here too, even if it feels unnecessary.
Once the holes are drilled, it’s time to assemble and install the lock. For cam locks (the most common type for single-door wardrobes), slide the lock cylinder through the hole you drilled from the inside of the door, then secure it with the mounting nut that comes with the kit. Tighten the nut just enough to hold it in place—over-tightening can warp the door or make the lock hard to turn. Then, align the cam (the small metal arm that sticks out from the back of the cylinder) so that when you turn the key or combination, it lines up with the strike plate. Screw the strike plate into the door frame or opposite door, making sure it’s flush against the surface so there’s no gap for the cam to slip out. For interlocking latch locks (for double-door wardrobes), install the latch on the edge of one door, the receiver on the edge of the other door, then screw both into place, testing the fit a few times to make sure the latch catches smoothly without sticking. If you hear a grinding noise or the latch won’t close all the way, double-check your alignment—chances are you marked the strike plate slightly off, so you can loosen the screws, shift the plate a quarter-inch, and try again. A small amount of misalignment is easy to fix, and most of the time it just takes a quick adjustment of the screws.
If you’re installing an adhesive lock instead of a drilled one, the process is even simpler, though it’s less durable for long-term use. First, thoroughly clean the area where you’ll install the lock and strike plate with rubbing alcohol—oil, dust, or lint will stop the adhesive from sticking properly. Peel off the backing from the adhesive pads on the lock and strike plate, press them firmly into place for 30 seconds to ensure good contact, then let them sit for at least an hour before using the lock. I always caution renters to test the adhesive lock after 24 hours; if it feels loose, you can add a tiny bit of extra adhesive or use a heavy-duty double-sided tape for extra hold. Adhesive locks work great for short-term use or for surfaces that can’t be drilled, but I recommend upgrading to a drilled lock if you plan to use the wardrobe lock for more than a year, as drilled locks are far more secure and less likely to come loose over time.
Now, a few common mistakes to avoid that I see all the time as a supplier. First, don’t place the lock too high or too low. I’ve had customers place locks on the very top of their wardrobe, only to realize they have to stand on a step stool every time they need to open it, or too low, making it easy for kids to reach. Second, don’t skip masking tape for drilling. Even a small scratch on a nice wood wardrobe can be a big headache, and that tiny strip of tape prevents that. Third, don’t force the lock into the hole. If the cylinder won’t slide all the way through, forcing it will strip the screw threads or crack the door—slow and steady is the way to go. Fourth, test the lock before putting everything back in your wardrobe. I always tell customers to turn the key or combination a few times, close the doors, and make sure the lock catches smoothly before they start storing clothes or items, because adjusting a lock that’s covered by sweaters or coats is way harder.

If you run into issues during installation—like a drilled hole that’s too big, a strike plate that’s misaligned, or a lock that won’t turn—don’t panic. Most problems have simple fixes: a too-big hole can be filled with a wooden dowel and wood glue before redrilling, a slightly misaligned strike plate can be adjusted with a power drill if you’re comfortable, and a stiff lock can be lubricated with a tiny bit of graphite powder (never use oil, which can attract dust and gum up the works). For anyone who’s not comfortable drilling or handling power tools, most local handymen can install a wardrobe lock in 15 minutes, and the job is cheap enough that it’s not worth stressing over if you’re not handy.
Smart Lock At the end of the day, installing a wardrobe lock is a small project that makes a huge difference for security, organization, and peace of mind. Whether you’re keeping valuables safe, keeping little ones away from hazardous items, or just keeping your wardrobe closed to avoid dust buildup, a well-installed lock will last for years. If you’re in the market for a high-quality, durable cabinet lock that’s designed specifically for wardrobes, we carry a range of styles and sizes to fit every door type, from thin particleboard to solid wood and metal. We also include free installation guides and templates with every order, so you don’t have to worry about finding the right parts on your own. If you’re ready to upgrade your wardrobe security or have questions about which lock is right for your space, feel free to reach out to our team for more details and to discuss your specific needs.
References
- "Cabinet Lock Installation Guide for Residential and Commercial Applications," National Hardware Association, 2022.
- "Choosing and Installing Cabinet Locks for Wardrobes and Storage Units," Home Improvement Research Institute, 2021.
- "Tool Safety and Best Practices for Drilling Household Repairs," Occupational Safety and Health Administration, 2020.
- "Childproofing Residential Storage Areas: Best Practices for Secure Locking Centers," American Academy of Pediatrics, 2023.
Suzhou Baileji Intelligent Lock Industry Co., Ltd.
As one of the most professional cabinet lock enterprises in China, we’re featured by quality products and good price. Please rest assured to buy discount cabinet lock in stock here and get pricelist from our factory. Also, customized service is available.
Address: 3rd Floor, Building 9, Shengteng Industrial Park, No. 8 Ruyuan Road suzhou, jiangsu, China
E-mail: vip@bailejilocks.com
WebSite: https://www.bailejilock.com/
